
While I don’t want to claim that the actual life of a chicken is devoid of meaning, I will say that to a skilled culinarian, its afterlife is is rife with it.
Knowing how to handle a whole chicken is a kitchen skill that is hard to over-value. Regardless of your culture or location, deboning a chicken, using the bones to make a stock or broth, and then turning that into a soup that appropriately utilizes its meat, is a skill that not only will save you money, but can make feeding yourself — and even a whole family — much easier and more rewarding. A whole raw chicken can be purchased in just about any grocery store in America, usually for under $15, and with the proper skills, you can accomplish all of this. Let me just go ahead and take you through all three stages of the afterlife of a chicken.
Deboning
First thing’s first, and truer words will never be spoken: good soup starts with good stock. And in the case of chicken stock, that starts with chicken bones. A good local butcher shop not withstanding, procuring the bones necessary to make good chicken stock requires a bit of butchery expertise that I am here to try to share: that of the (not-so) daunting task of de-boning a whole chicken. Let’s start with the setup…
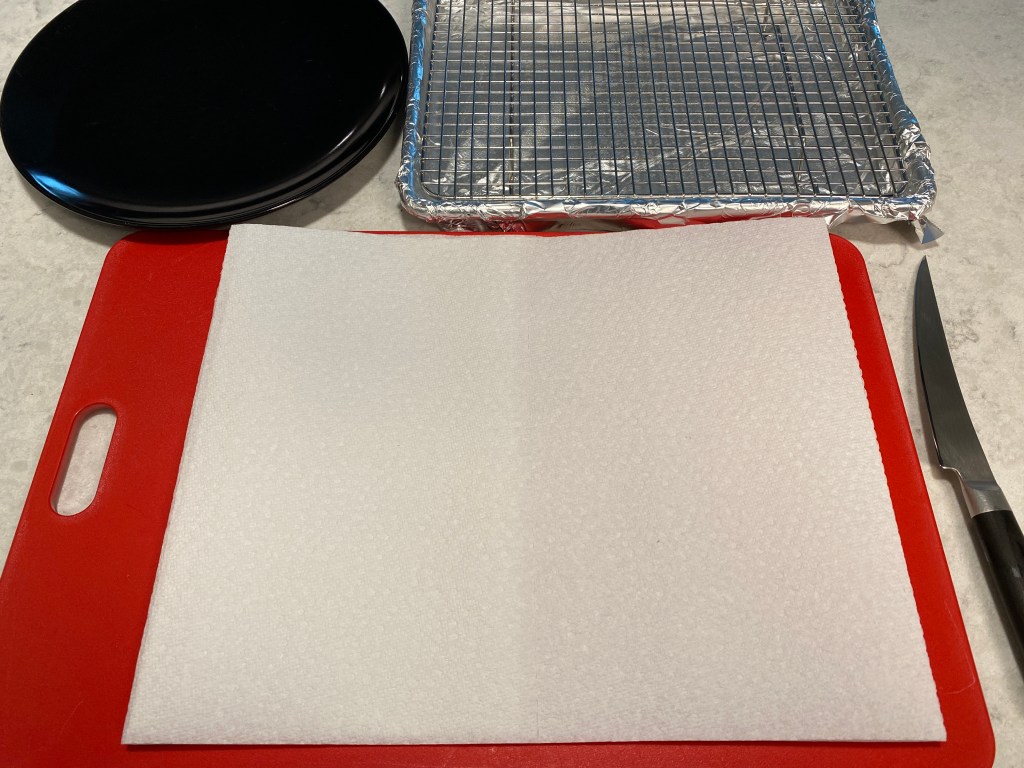
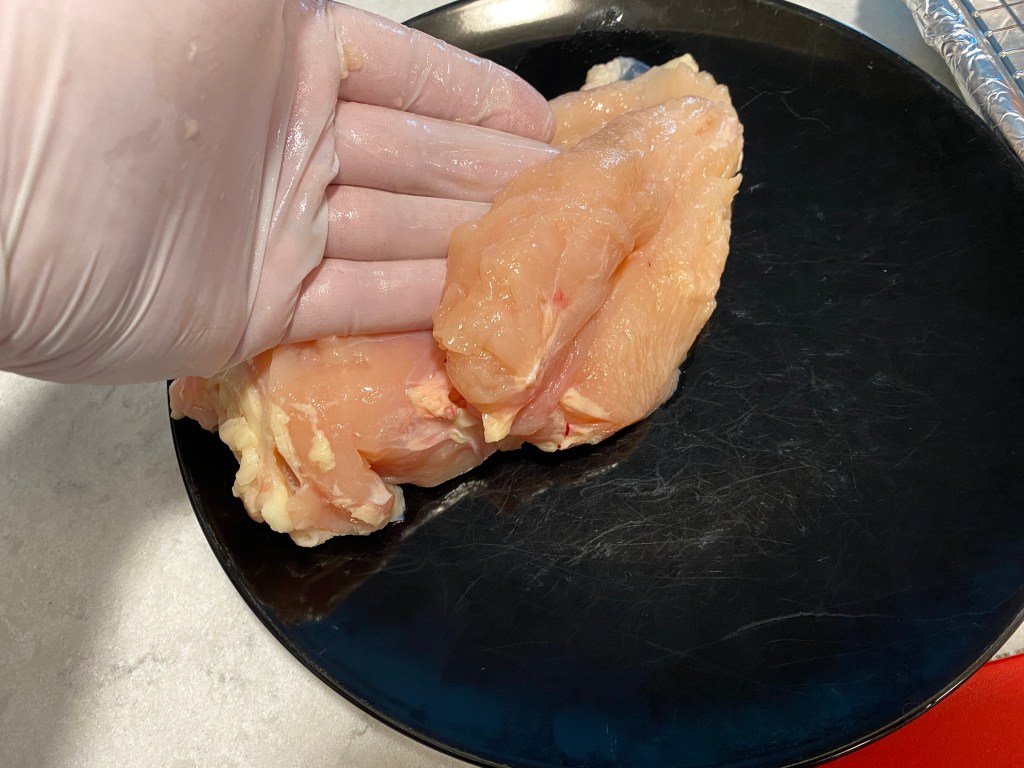
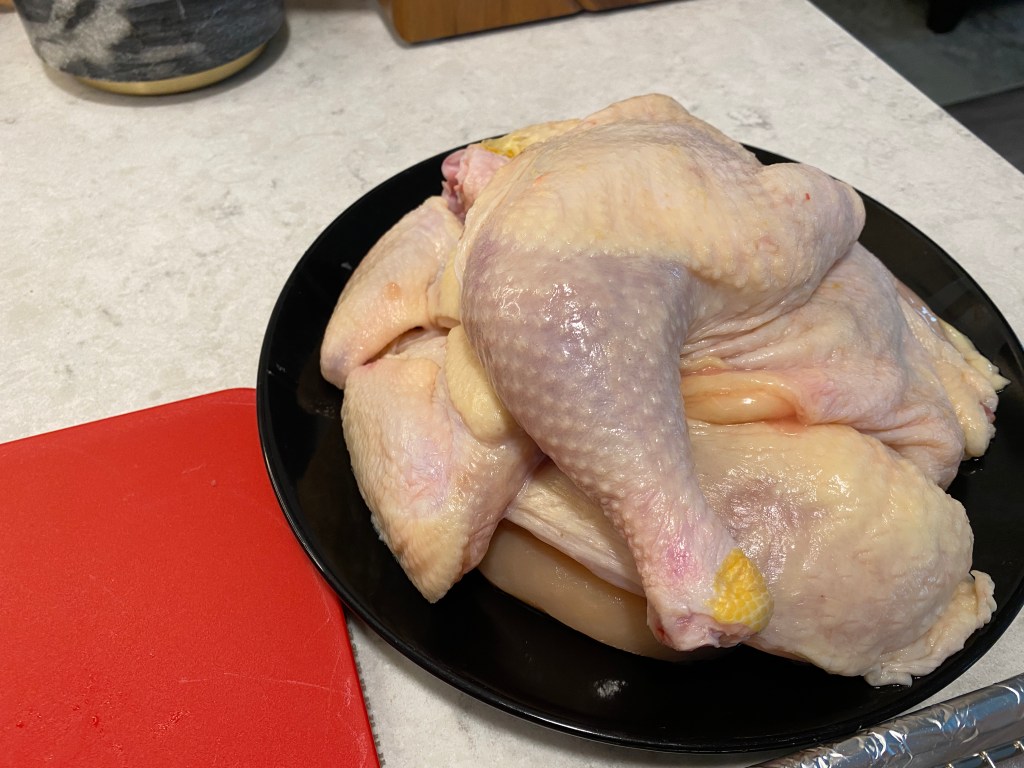
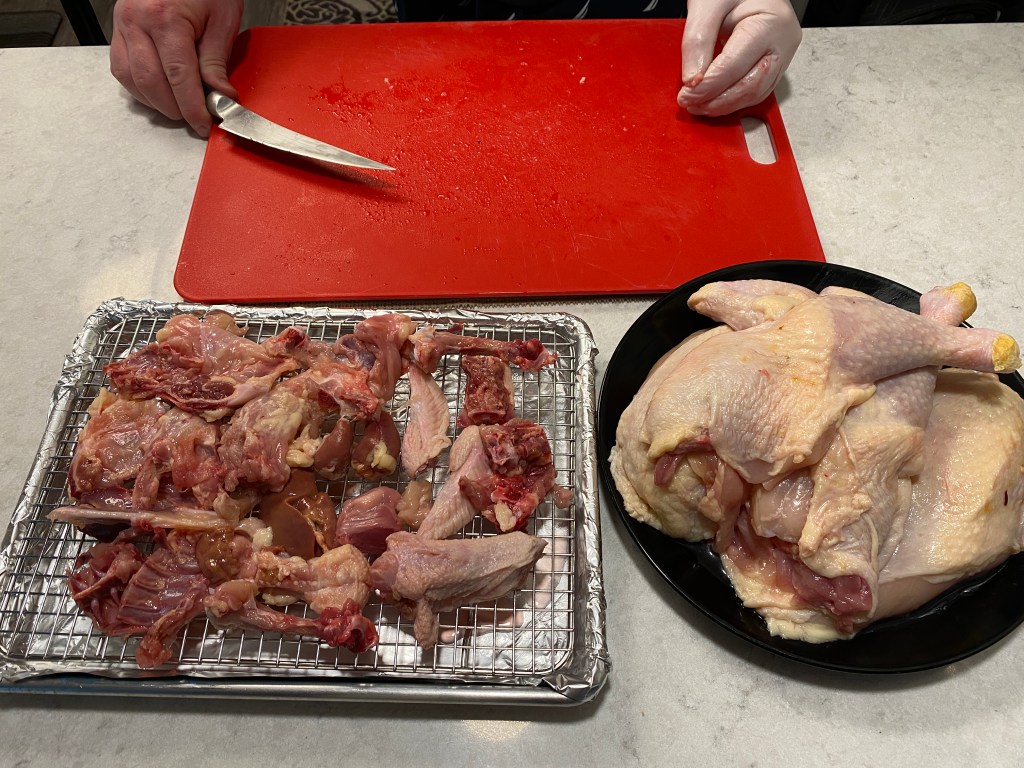
You’ll need a cutting board, big enough for the bird itself (plus a little wiggle room), with a few layers of paper towel on it. In addition, you’ll need something to receive the pieces of poultry you’ll be removing from the carcass (the plate, in the above picture), a knife able to do such a task (a fillet or boning knife is ideal, but this can be done with any sharp knife with a pointed tip), and a foil-lined sheet tray, ideally with a roasting rack, but the rack isn’t essential. It should be noted, that the sheet tray/roasting rack are only necessary when making a “brown stock”, as opposed to a “blond stock”. I’ll address that further when we start making the stock.
Careful when taking it out of the package (if it comes in one), as there will be extra chicken juice in the package (you don’t want that juice. Throw it away in the bag). Try to be careful not to make a mess, as contact with raw chicken (or its liquids) is about as nasty of a contaminant as there is. Anything touched by raw chicken should be sanitized thoroughly before it touches anything else.
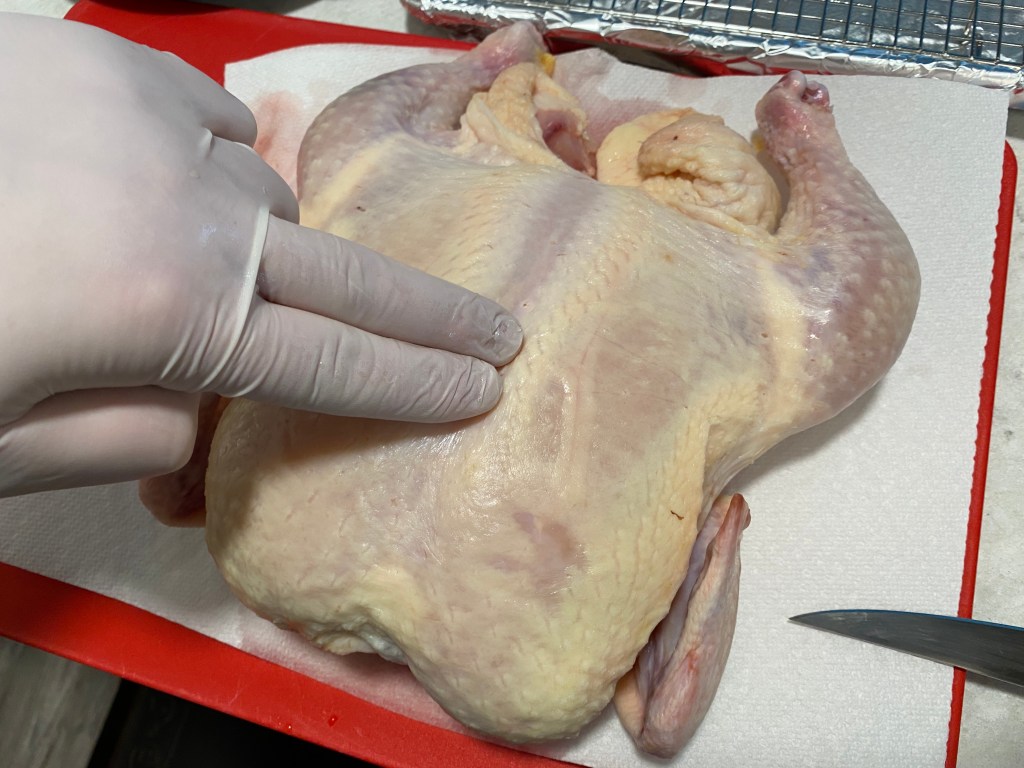
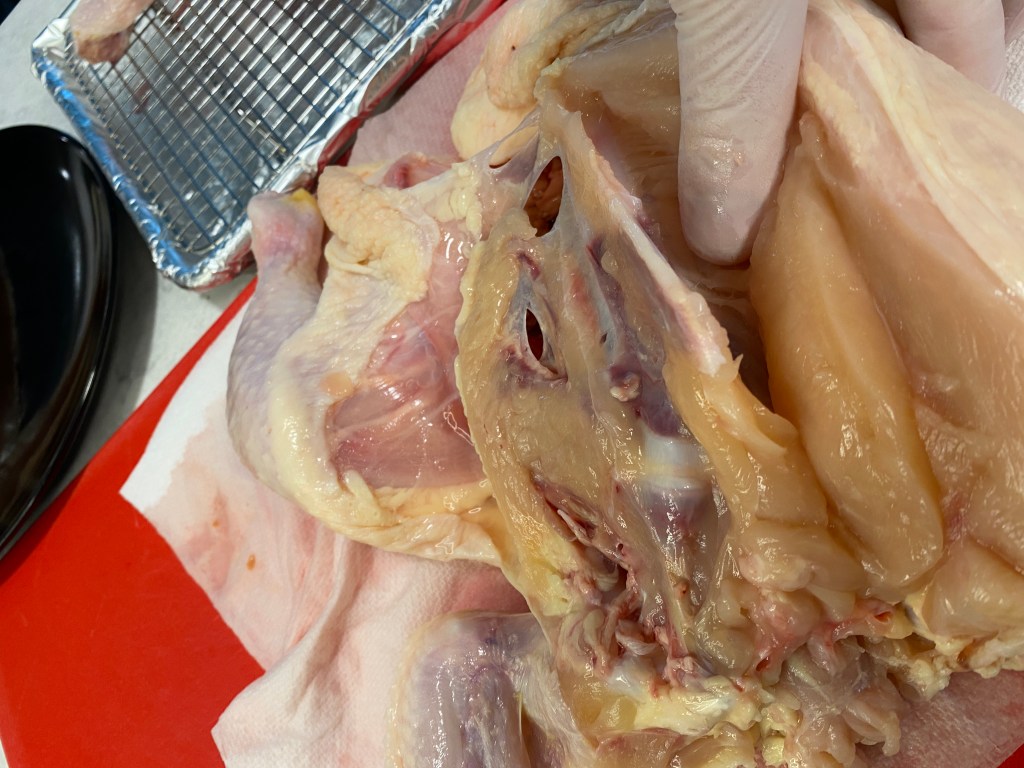
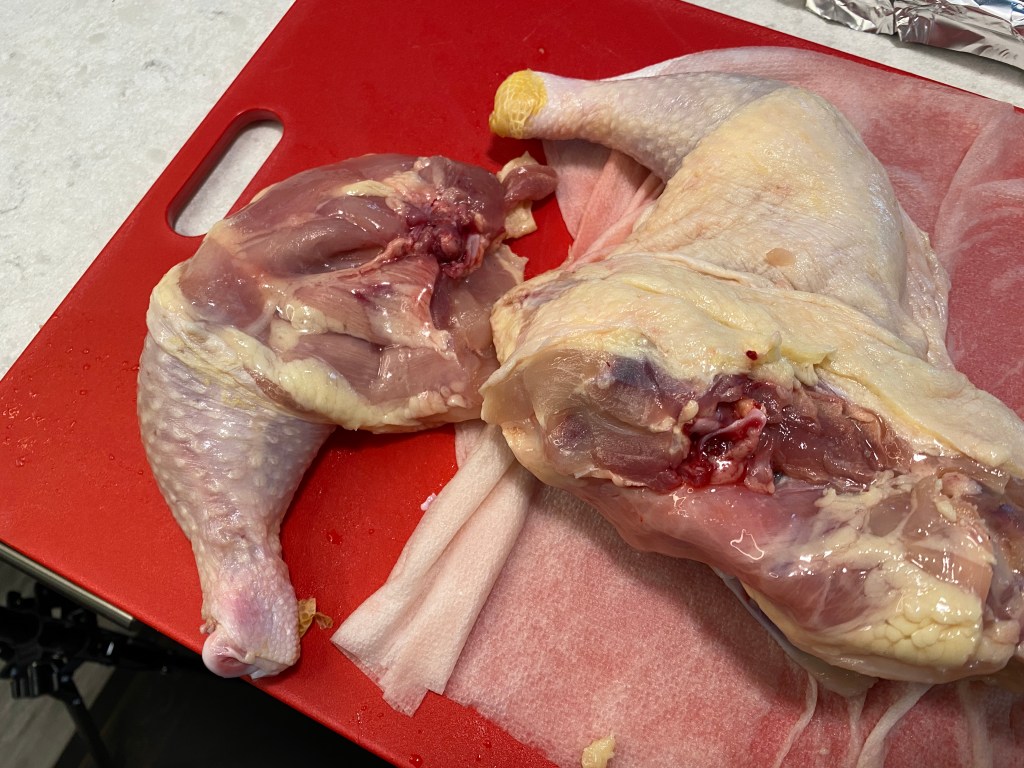
Big picture, you’re gonna be removing the breasts, the legs, and the wings from the carcass, and removing the bones from the thighs. You’ll want to start by positioning the chicken with the breast up, and the neck closest to you, with the legs facing away because it’s best to start with removing the breasts. It leaves the legs and wings intact, and they will sort of act like training wheels, keeping the bird from rocking around too much while you remove the breasts.
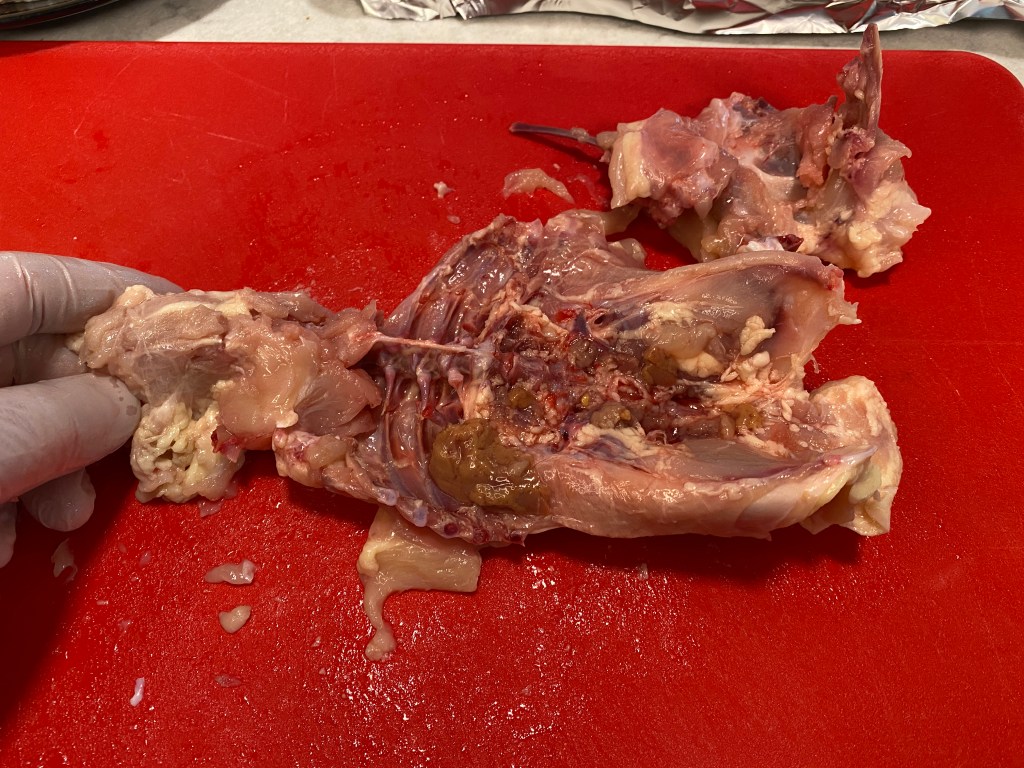
It will be in your best interest to dry all sides of the bird with paper towels, as well as the insides, once you clear them out. Speaking of which, most commercially-sold birds will come with the cavities packed with the offal, or “giblets”. In the interest of making stock, these you’ll be wise to keep. I understand that for many, handling raw poultry, the organs therein, or even viewing the pictures of such, may make some home cooks squeamish. I’m sorry. All living things look different on the inside, especially before such love and care is devoted to making them look as appetizing as they will, once put on a plate, or in front of a camera — that’s why we’re here 😁.
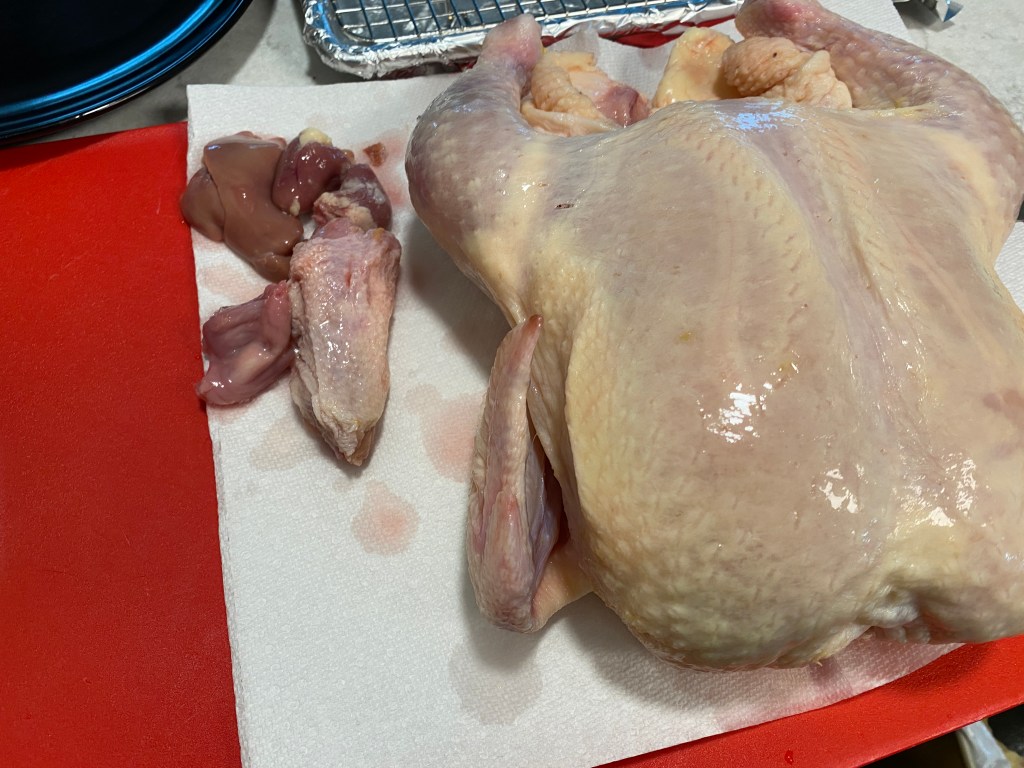
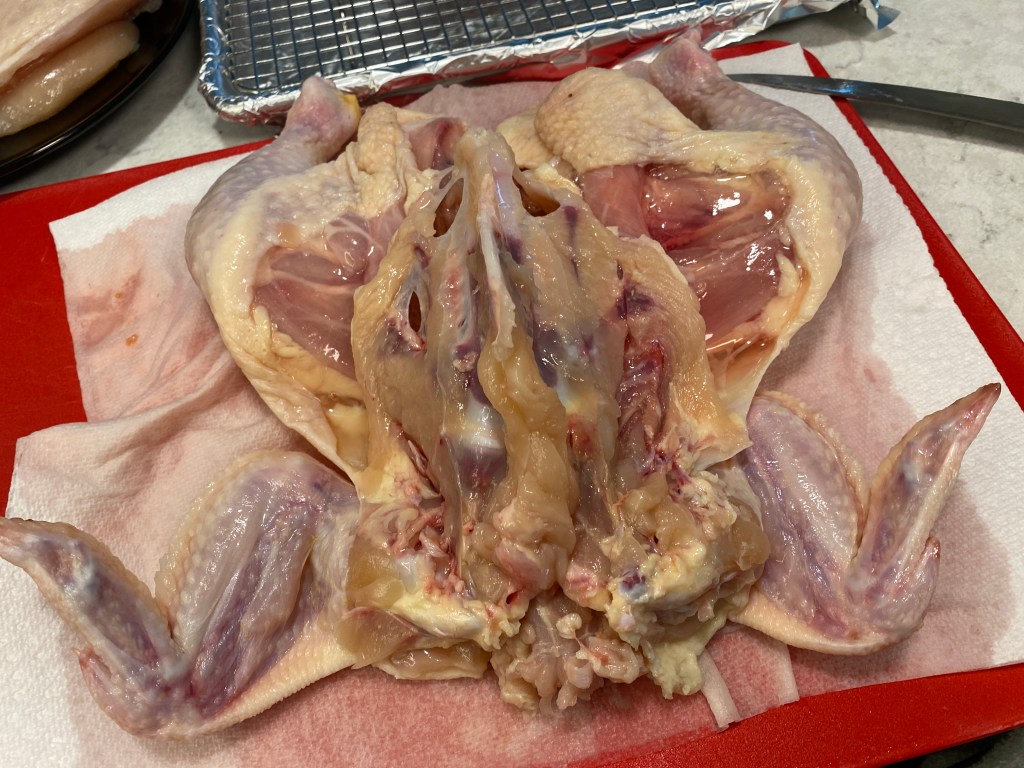
Anyway, like I was saying, take the neck, liver, kidneys, and heart out of the cavity of the bird. Sometimes they’ll be in a plastic bag of sorts, but take them out and put all of ’em on the roasting rack. While you don’t have to, you can leave the paper towel under the bird for this whole process — it actually keeps things much cleaner and steadier along the way.
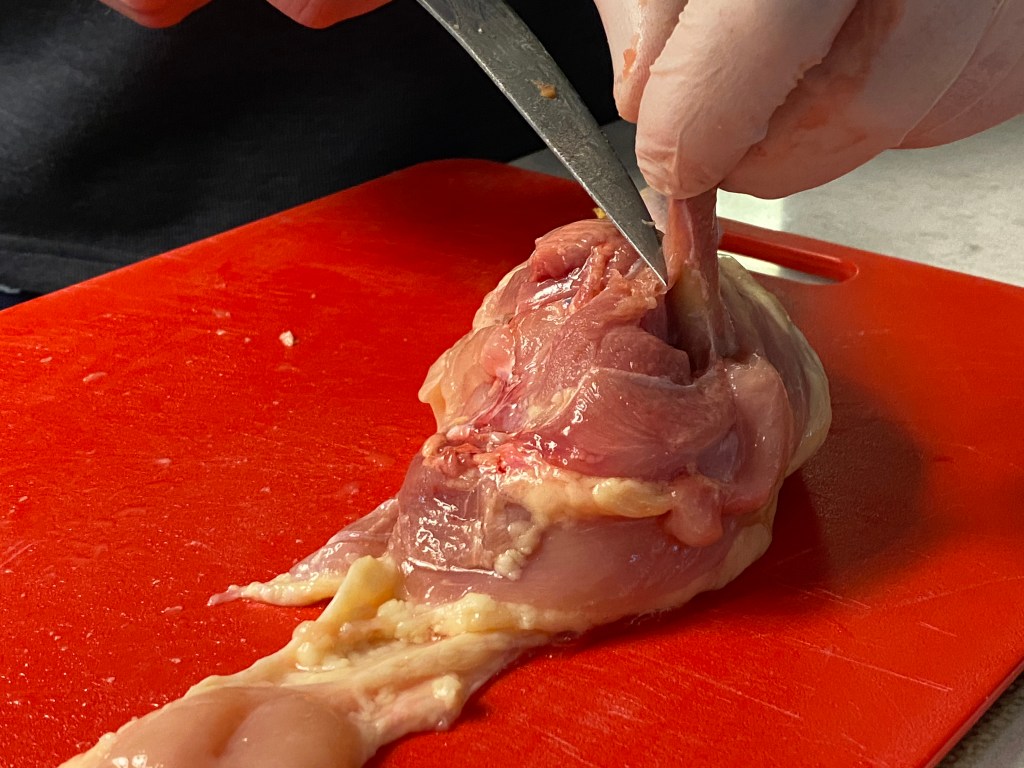
Now, using the fingers of your non-knife hand, locate the center of the breast bone. Place your knife where it protrudes to the surface the most, and drag your knife down the length of the breast bone toward the collar, allowing the knife to fall off to one side of the breast bone (you’ll do the other side too, but one side at a time). Once it does so, continue to slide the knife down along the side of the breast bone all the way to the breast plate.

The key to successful butchery is letting the bone guide your knife. If you find yourself applying loads of pressure, and cutting through meat, you’re probably not doing it right. De-boning something should involve more scraping bone with your knife, than actual cutting.
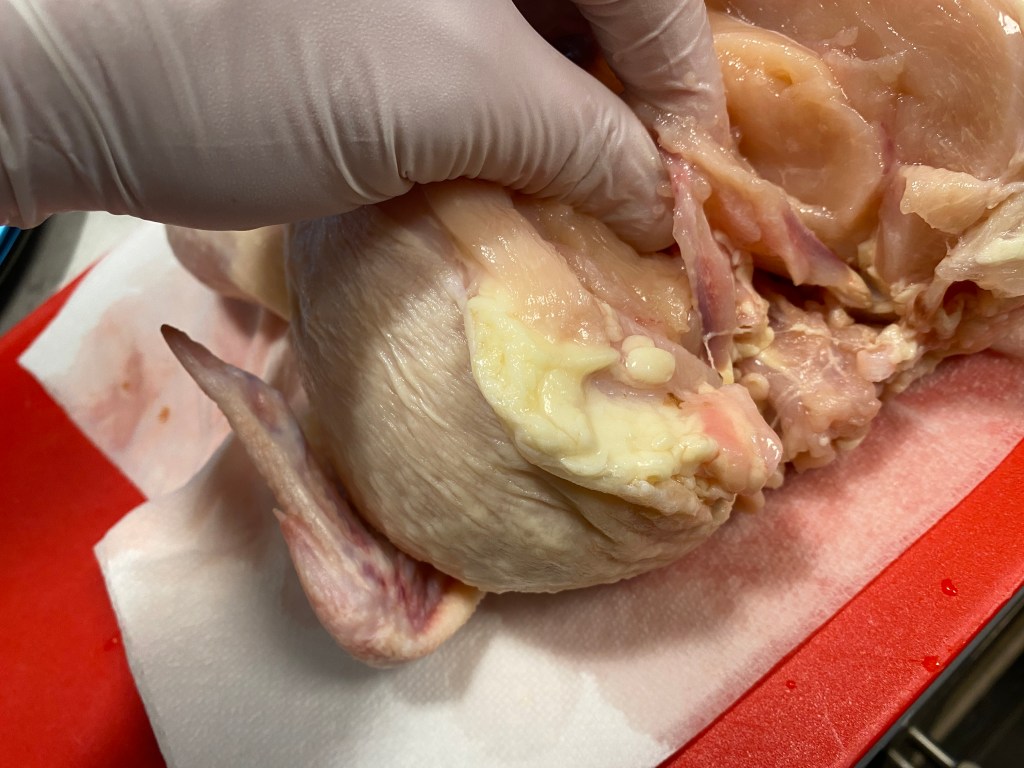
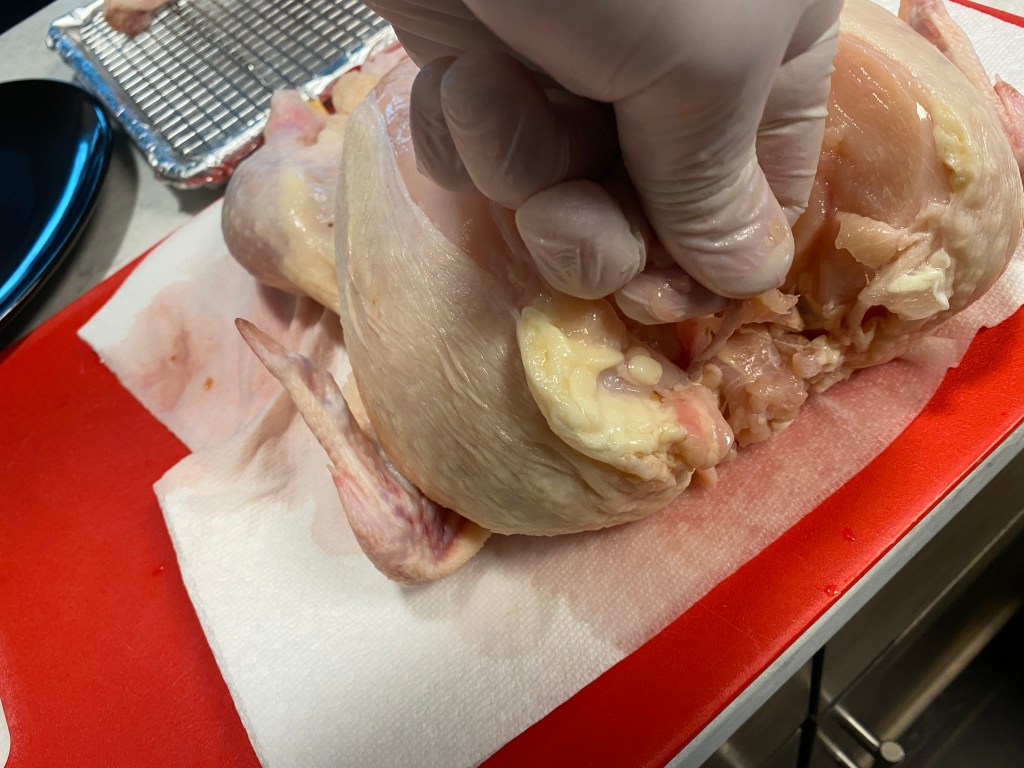
Once you get to the collar (what we in the States acknowledge as the “wishbone”), slightly tilt your knife toward the area of the head, while pulling the meat away from the bone off to the side. The idea here is that you’re leaving as much meat together on one side of your knife as possible.
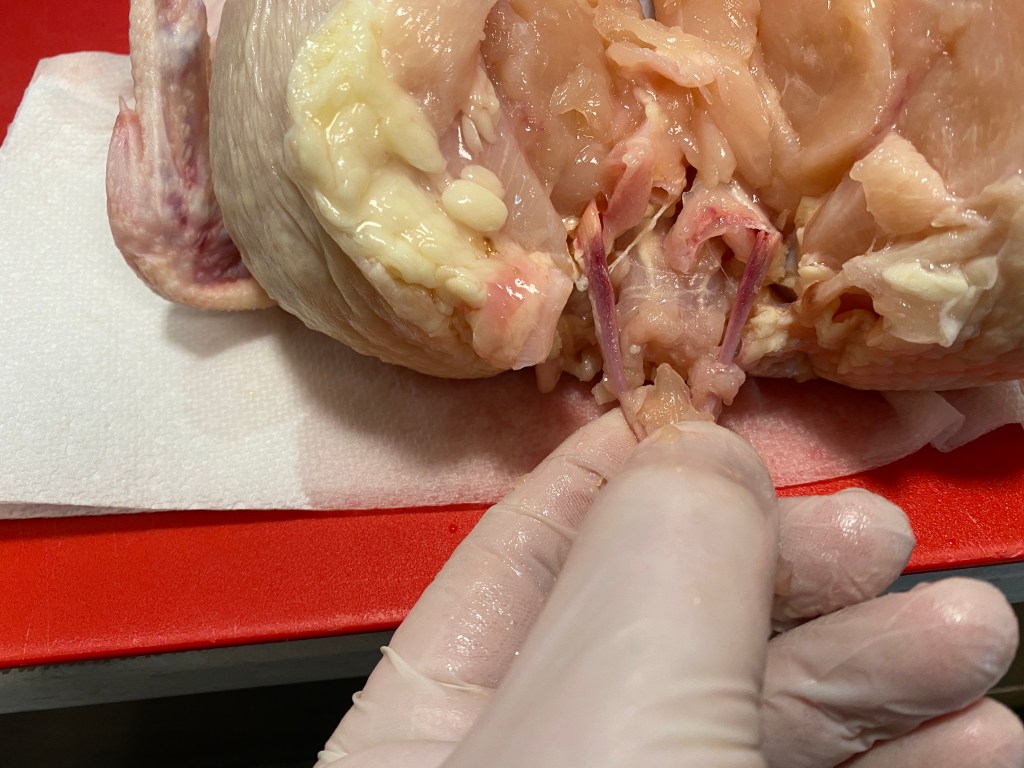
While you’re in this area, and doing such things to one side of the wishbone, go ahead and do the same to the other side. Once you’ve loosened the prongs of the wishbone from the breast meat on both sides, slide your fingers underneath them, and slide them up to the top, where the bone is held to the breast bone by connective cartilage. hook your index finger under the apex of the wishbone and pull it toward you. This should remove the wishbone entirely. Place it on the roasting rack with the giblets.
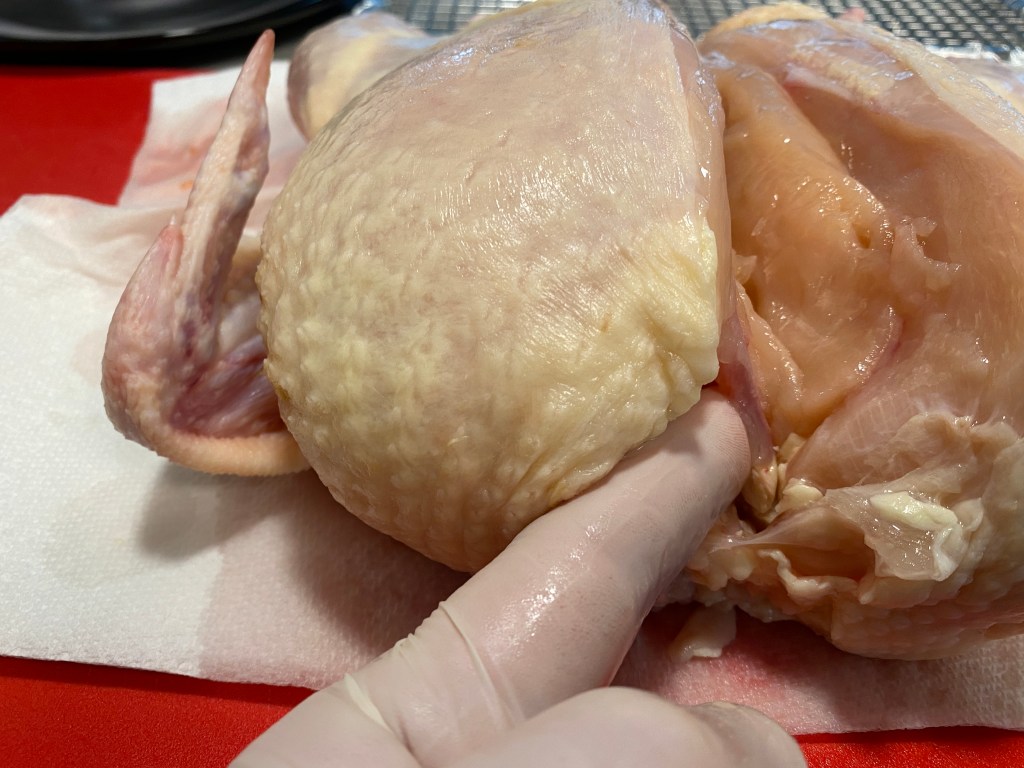
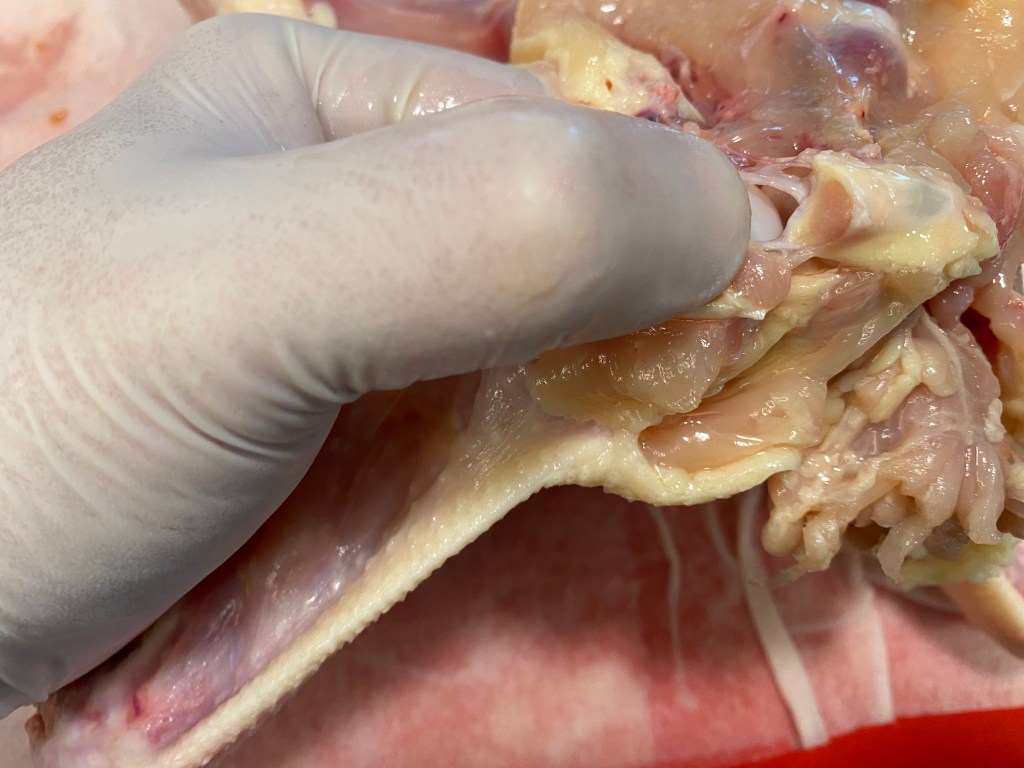
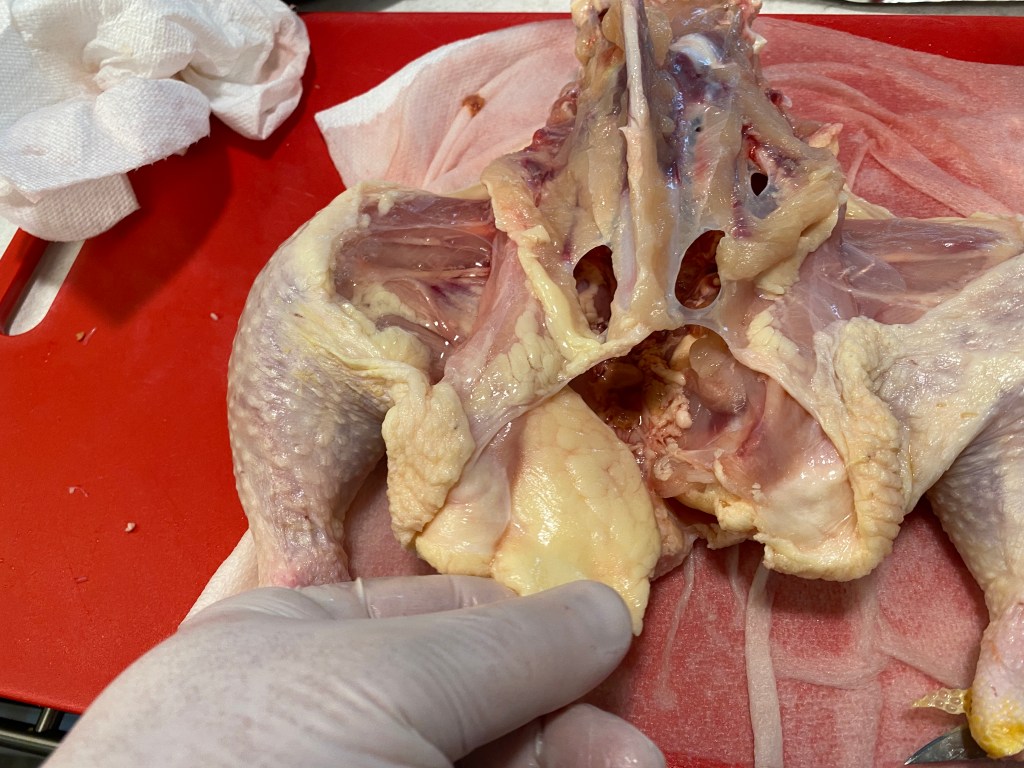
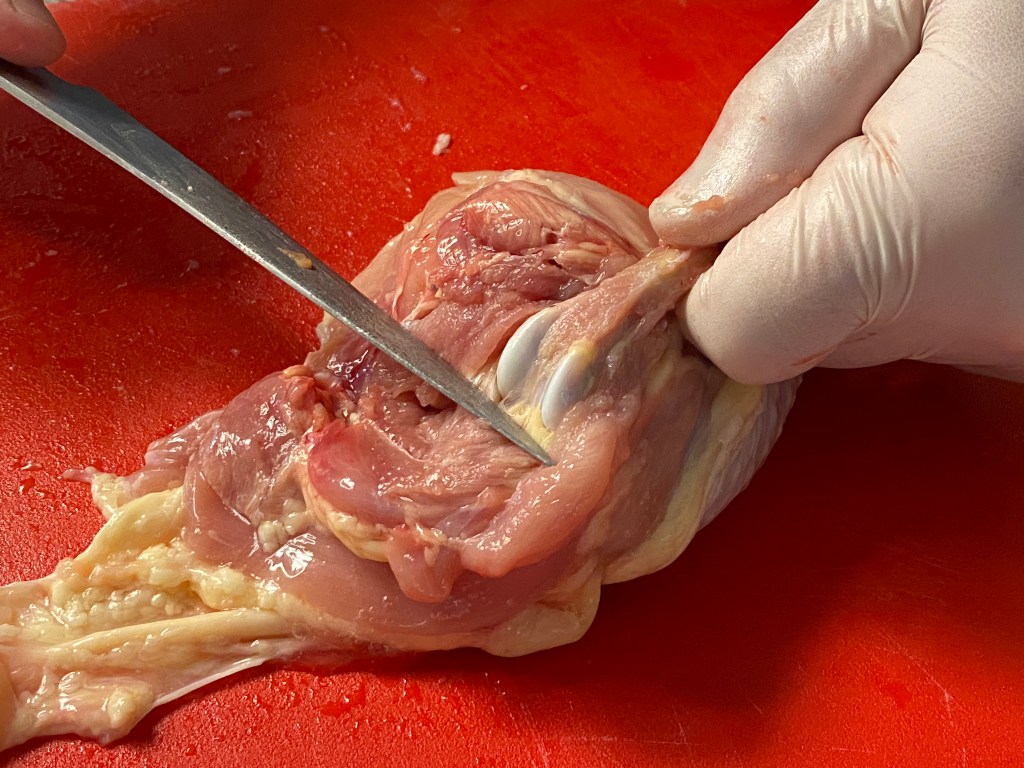
Now that the wishbone is out of the way, next you’ll want to slice the skin along the crevice between the leg and breast. This will show you where your end goal is for removing the breast. Then, slice the breast meat away from the center breast bone, down to the breast plate/rib cage, from the neck, all the way down to the bottom (above the cavity). Once you’ve done this, use your knife to gently peel the meat off of the rib cage, trying to keep as much meat on the fillet as possible, leaving as little on the carcass as you can.

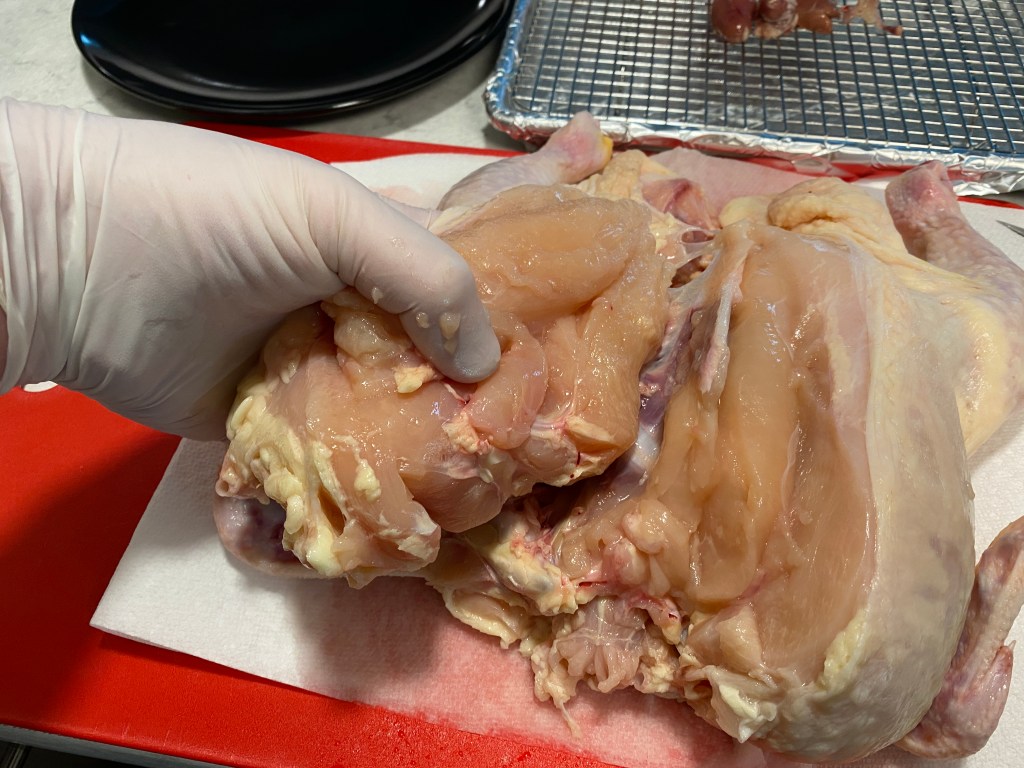
When it comes to the shoulder area, you’ll want to take the fingers of your non-knife hand, and locate the joint where the wing meets the body. Use the tip of your knife to work around the joint, and remove the breast from the top of the carcass. This will take some exploring with your knife, but with a little patience and care, you should be able to successfully (and safely!) remove the breast meat from the carcass.
Repeat all of this on the other breast.
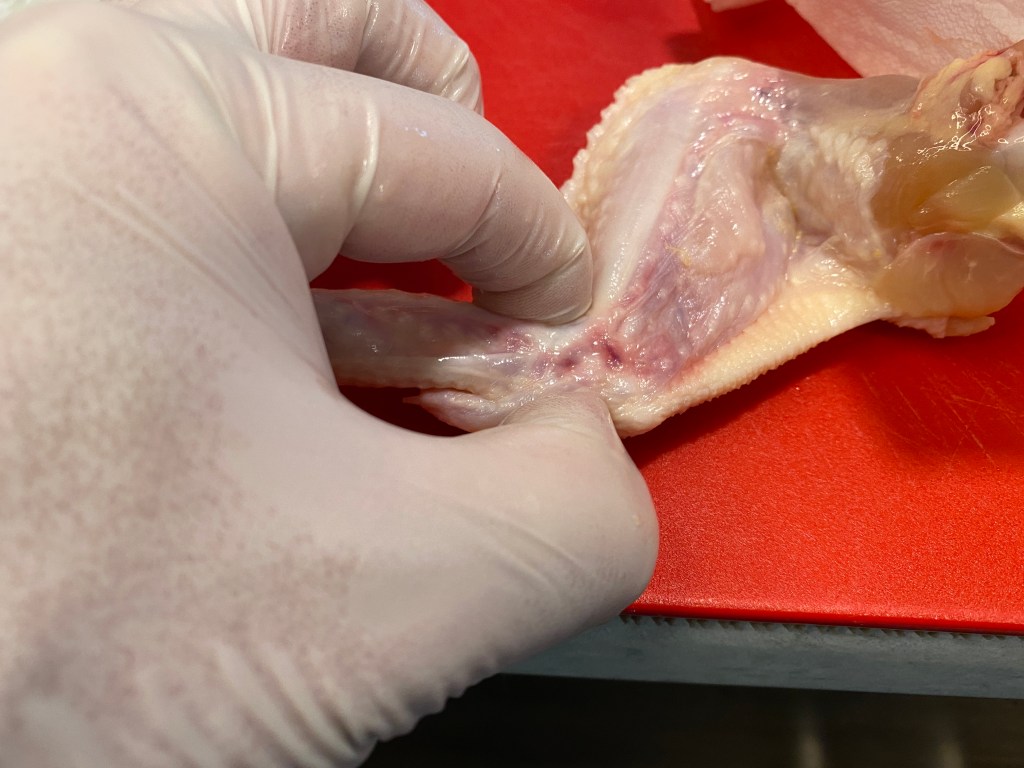
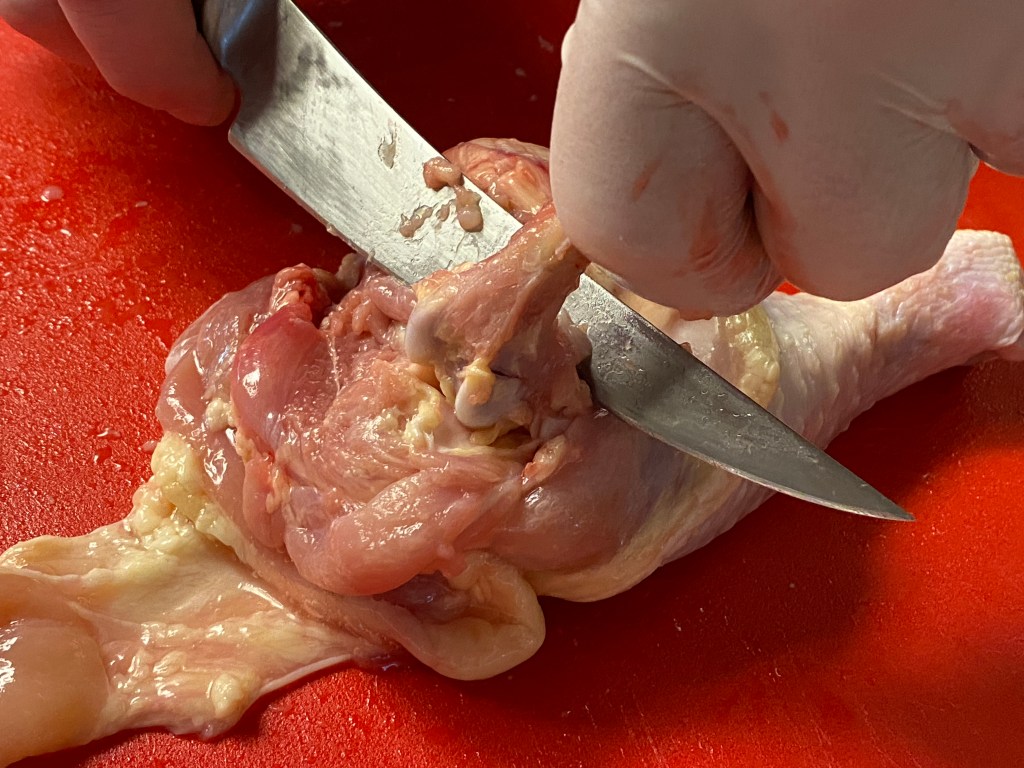
Next, you’ll remove the wings. In order to do so, simply find the joint connecting the wing to the shoulder, slide the tip of your knife between the bones, and carefully cut through the connective tendon. The joint can be exposed in various angles, by bending the wing away from whichever angle you want to expose.
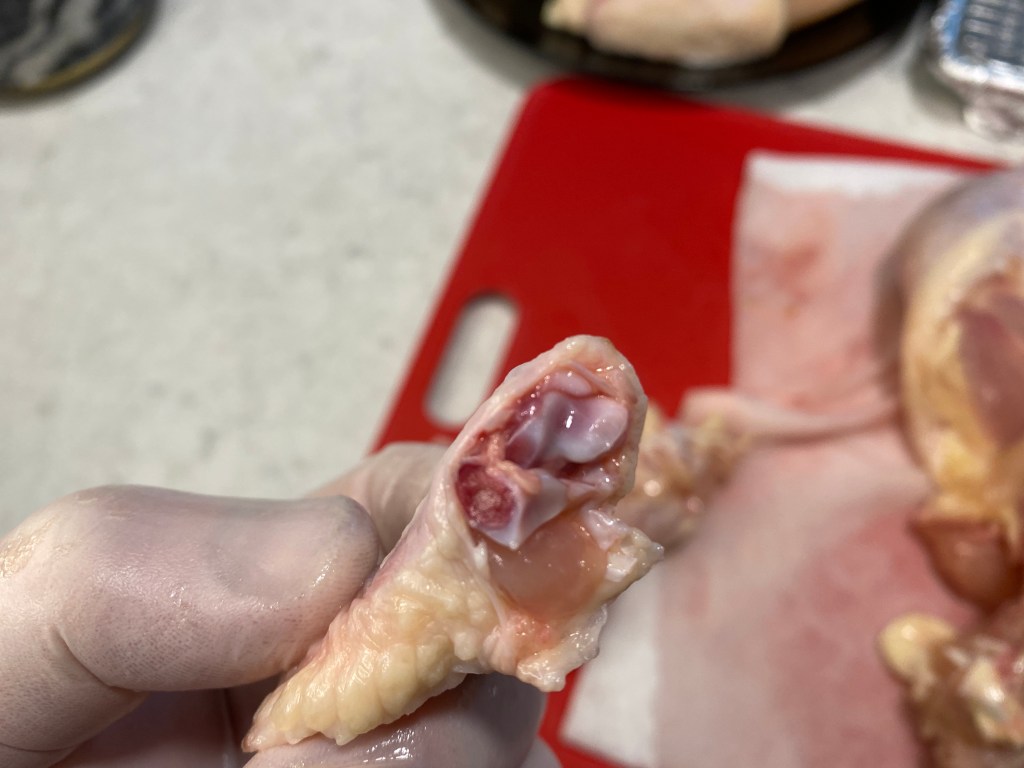
Once the wing is removed, you’ll want to remove the wing tip. Similarly, bend the tip to expose the joint, and locate it with your fingers. While your knife is capable of cutting through this thin chicken bone, do your best to cut through the joint for a clean separation (and for the well-being of your knife!). Set the wing tips on the roasting rack as well, while placing the wings aside with the breast meat.

Now onto the legs. First, trim away any excess fat by the opening to the cavity.


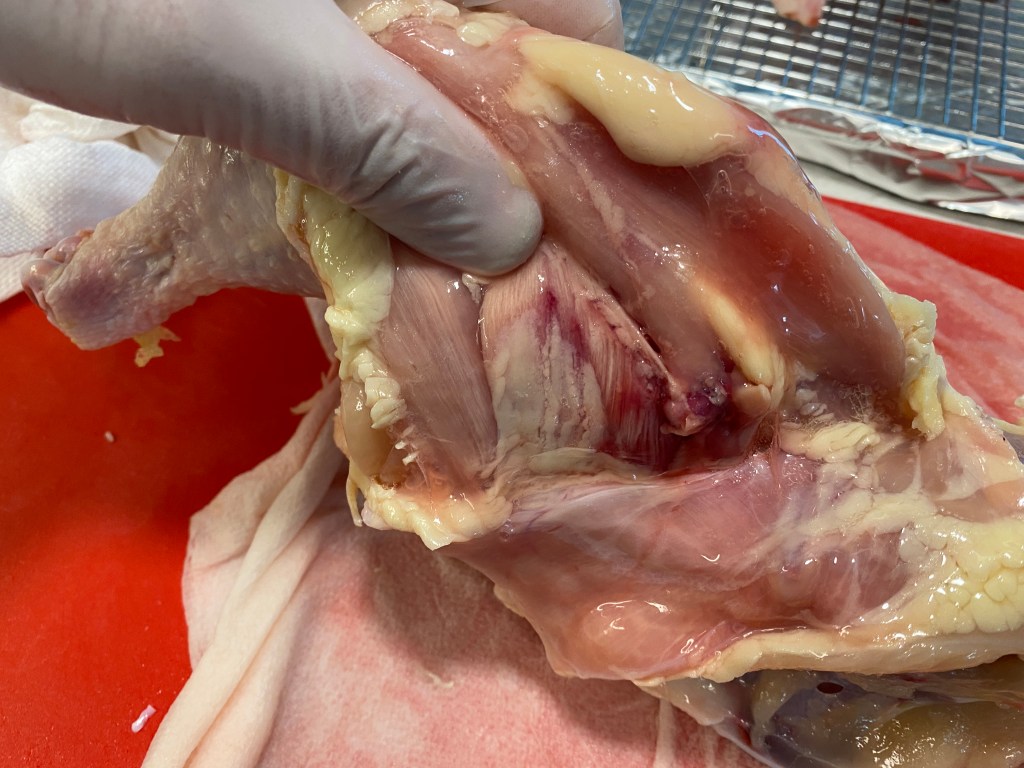
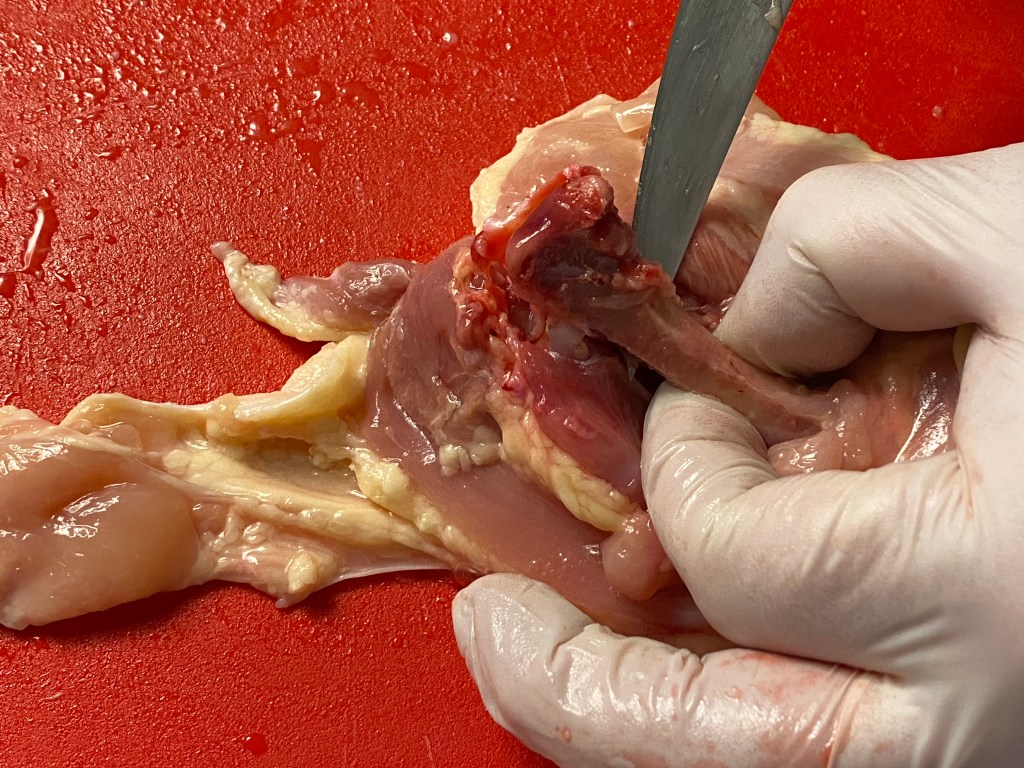
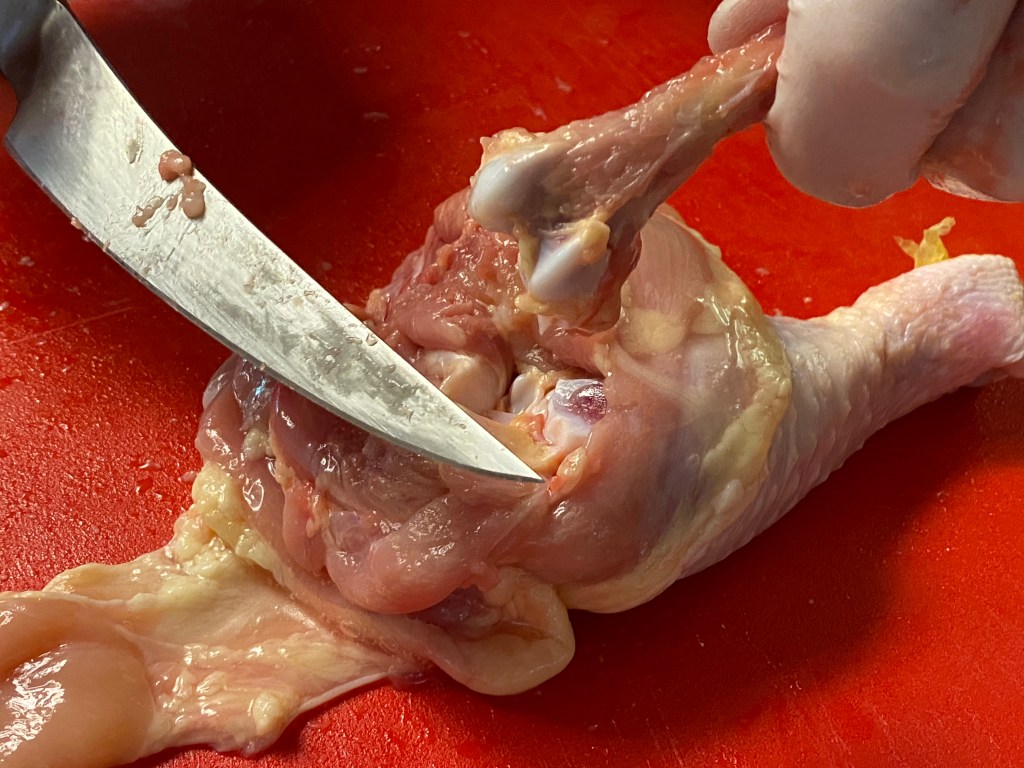
With the legs now facing you, bend one leg at the hip, away from the spine. This will expose the hip joint. Just like with the wing, slide the tip of your knife into the joint, and cut the connective tendons. Once you’ve done that, use your knife to follow the bone of the carcass towards the back, doing your best to include the “oyster” — the highly coveted piece of meat on the back of the chicken, at the top of the leg. Continue following the bone, all the way around to the tail, at which point, you should have removed the leg entirely. Repeat with the other leg.

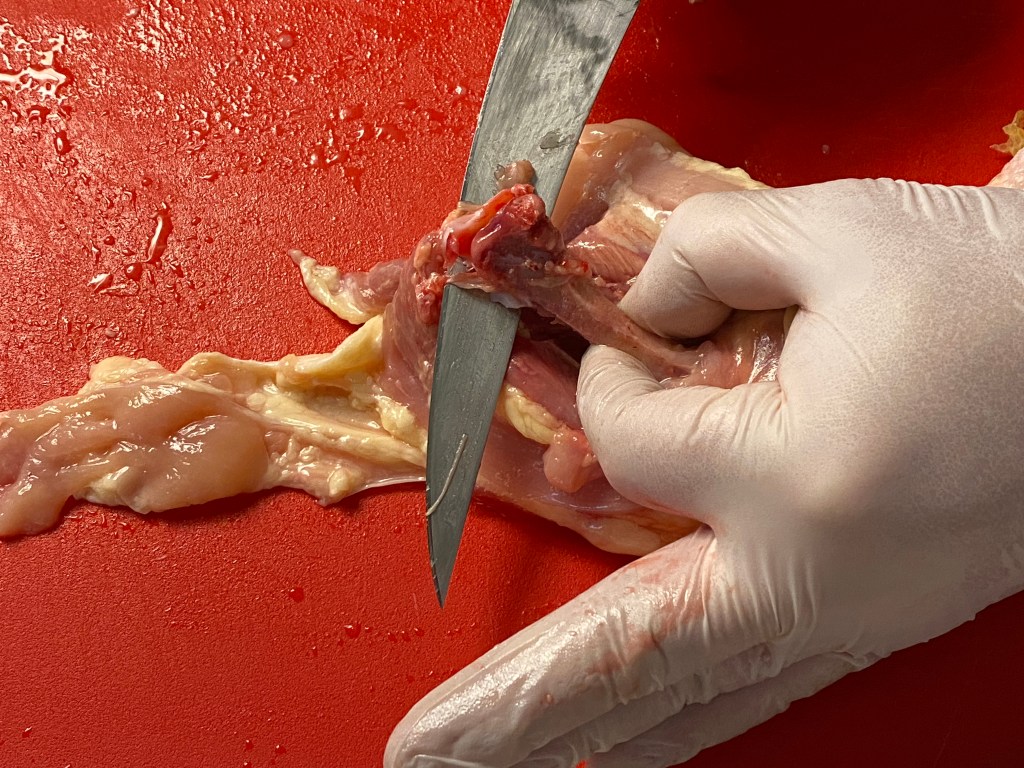
To remove the femur (or thigh bone), lay the leg skin-side down, and observe the thin white line that seemingly runs the length of the thigh from the hip to the knee. Slice along that line, and you’ll hit the bone. Slice down the length of the bone, and using that incision as a starting point, cut along both sides of the bone, down only about a quarter inch or so. Then, use the tip of your knife to scrape the meat off, scraping toward the knee. Do this, working around to the bottom of the bone, until your fingers can touch around the bottom. Now, slide your knife through where your fingers are meeting with the blade away from your fingers, but toward the top of the leg. Slide the blade along the bone toward the top, until you’ve severed the top bone joint from the thigh meat. Now, continue scraping the meat down off the bone, toward the knee, until you reach the joint. If you do so far enough, you’ll also pull the drumstick bone and knee cap away from the femur, enough to expose the tendon. Cut the tendon, and repeat the process on the underside to remove the femur completely. Place the femur on the roasting rack.


Repeat this process on the other leg.
Congratulations, you just deboned a chicken!
Chicken Stock
Let me draw your attention to the carcass still on your board: Using a combination of your boning knife, a chef’s knife, a cleaver, or just your hands, dismantle the carcass into several smaller pieces. The more bones you can break through, the better (when it comes to stock making), but if you don’t feel comfortable cutting through bone, don’t do anything that you think might result in hurting yourself — or your knife. Place all carcass parts on the roasting rack.

Now, let’s return to something I alluded to above: blond vs. brown stock. The ingredients for both are the same, but how you treat them is entirely different, as are the end results themselves. A blond stock is lighter in color with a cleaner, fresher flavor profile, while a brown stock is dark, rich and full-bodied. If done correctly, one is no better than the other, and whichever you decide to make is largely determined by what it will be used for. I also tend to go by the general approach of seasonality: if it’s cold outside, I prefer brown stock; if it’s warm out, then blond. Since, as I’m writing this, it’s snowing outside and under 20ºF, we’ll be proceeding with making a brown stock.
*It’s worth noting that for a blond stock, instead of roasting the bones, you would bring a pot of water to a rolling boil, put the bones in, allow it to return to a boil, and after 10 minutes or so, remove the bones and rinse them under cold water.*
Roast everything at 420ºF for roughly an hour. The bones should be dark brown, but not burnt. You might need to flip some of them over at the half-way point.
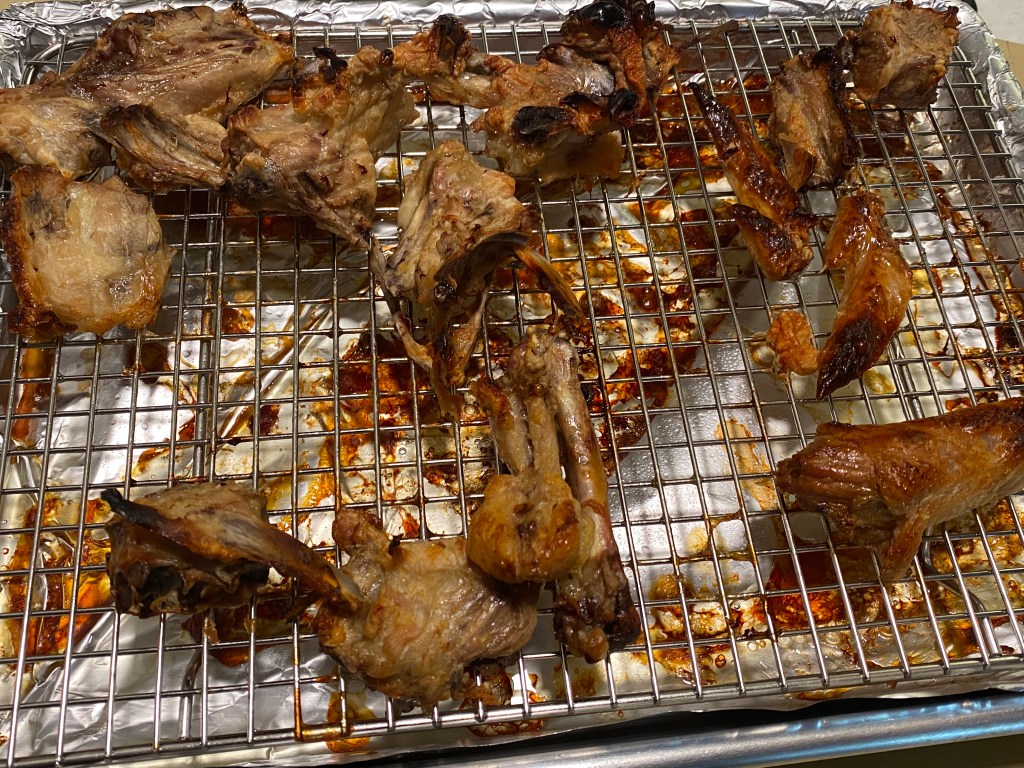
Once the bones are done, remove the rack (if you used one), and (being careful not to burn yourself!) splash about a quarter cup of water onto the pan, and use a wooden spoon or rubber spatula to scrape off all the brown bits stuck to the foil/pan. These bits are known as fonde, and they are just concentrated chicken flavor, that will only enhance the flavor of your stock. Pour off this fonde-water into a container, and save it to add to the stock later.
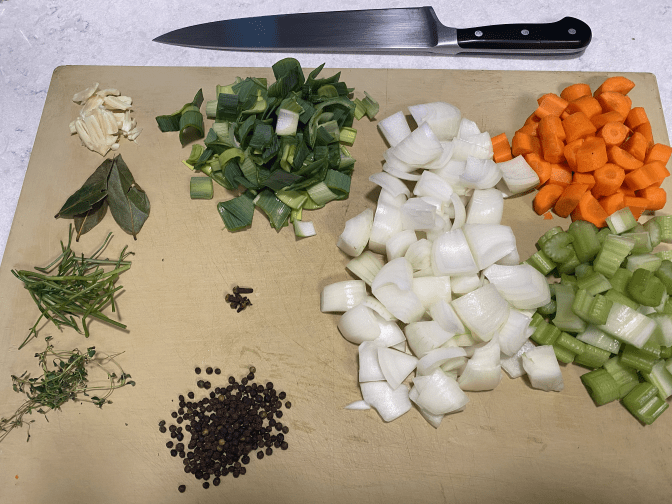
Elsewhere, you’ll need two cups of large-diced onions(320g.), one cup of large-diced celery (washed)(240g.), and one cup of large-diced carrots (either washed or peeled) (220g.). A cup of large sliced green leeks or fennel tops is optional. You’ll also need 4-5 sprigs of thyme, 3 sprigs of parsley, 4 garlic cloves, 1/4 cup of black peppercorns, 2-3 fresh bay leaves, and 4-5 cloves.
In a pot big enough to hold 1.5-2 gallons of liquid, add a tablespoon of oil, and put over medium-high heat. Once the oil is hot, add your vegetables (if using leeks, don’t add those yet). Stir enough for them to be coated, but then allow them to sit so as to caramelize. After 3-4 minutes, use a spoon to slightly reveal the bottom of the pot in the middle of it. If it’s starting to brown the vegetables (and the bottom of the pot), give the pot a good stir, scraping the bottom of the pot. If not, wait another minute or two until it is. Reduce the heat to medium, repeat this process 3-4 times, then add everything else, and continue to caramelize the contents of the pot to the best of your abilities.
*When making a blond stock, it’s important to sweat the vegetables, doing your best to not allow any color or caramelization to appear. Continue to sweat until the vegetables refuse to not stick to the bottom of the pot, then add the water.*
Once everything has reached the desired color and aroma, add a cup of water and, using a wooden spoon, deglaze the bottom of the pot (that means, scrape all the fonde off, so it gets into the liquid). Once the bottom of the pot has been deglazed, add another gallon and a half of water, the fond-water from the roasting pan and the roasted chicken parts, and return the pot to the heat.
Once the water reaches a simmer, reduce the heat to medium-low, so the liquid maintains a gentle simmer.
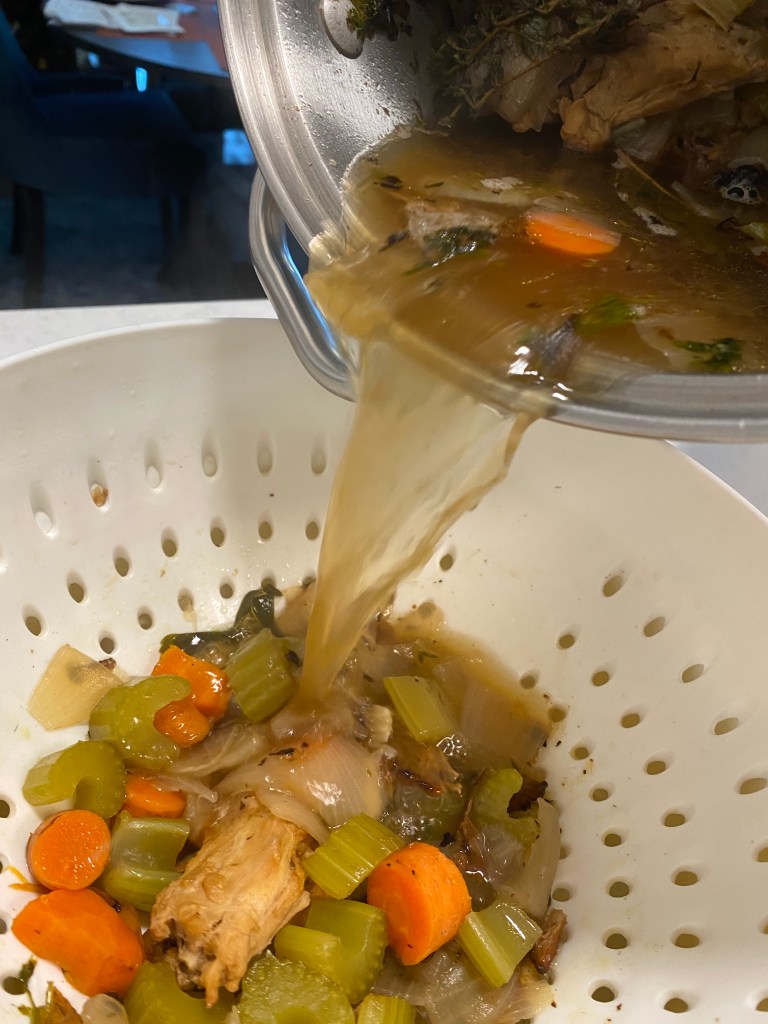
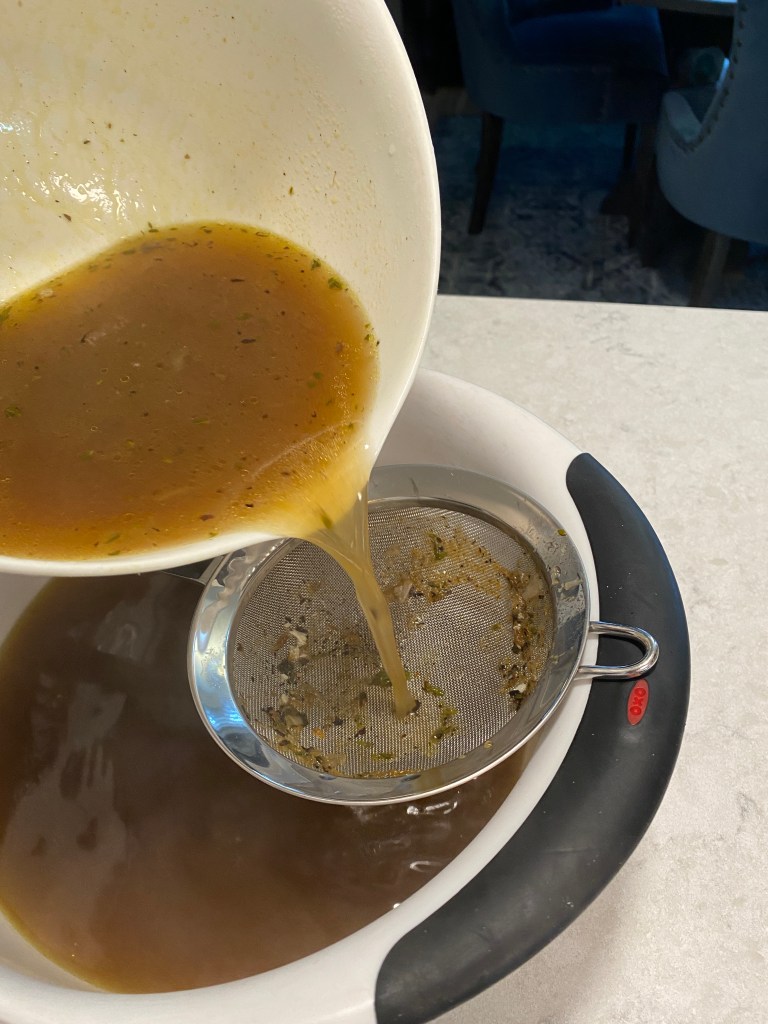
Simmer for 1-3 hours (the longer it goes, the more flavorful your stock will be), then strain the liquid, first through a colander to get all the big pieces, and then through a fine mesh chinois. Allow it to sit for 10-15 minutes, then skim whatever fat may have rendered off the top.
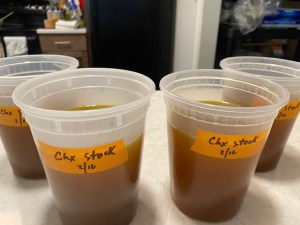
Voila! Brown chicken stock!
Separate into smaller containers for easy storage, making sure to label and date each one.
Chicken Soup
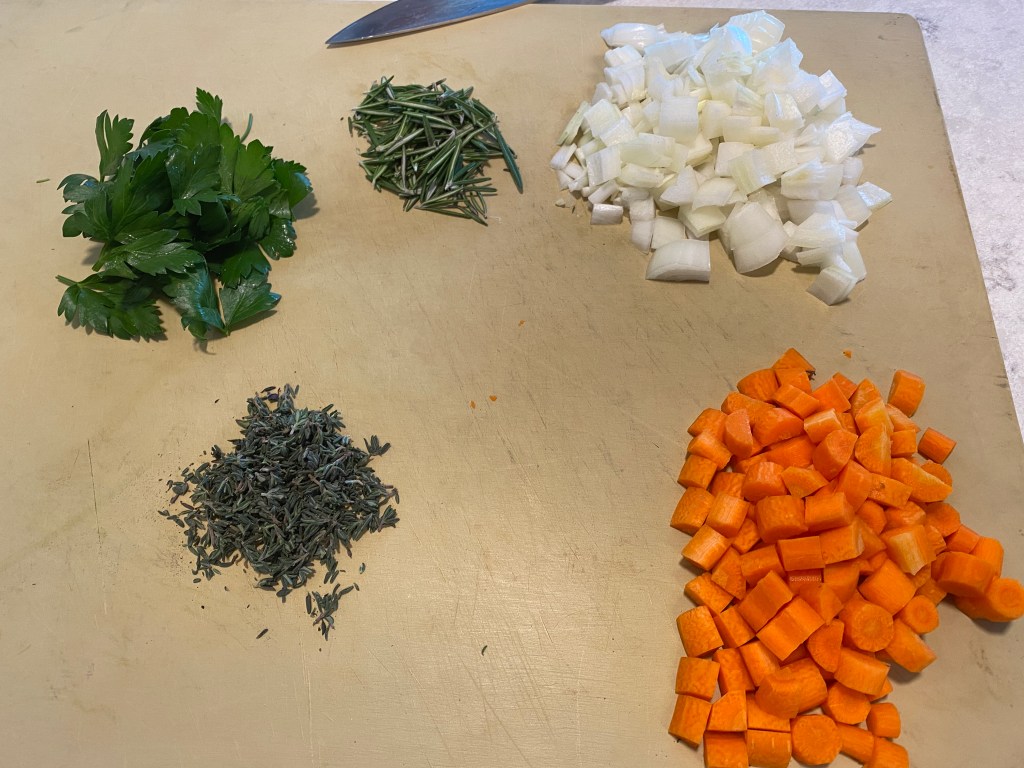
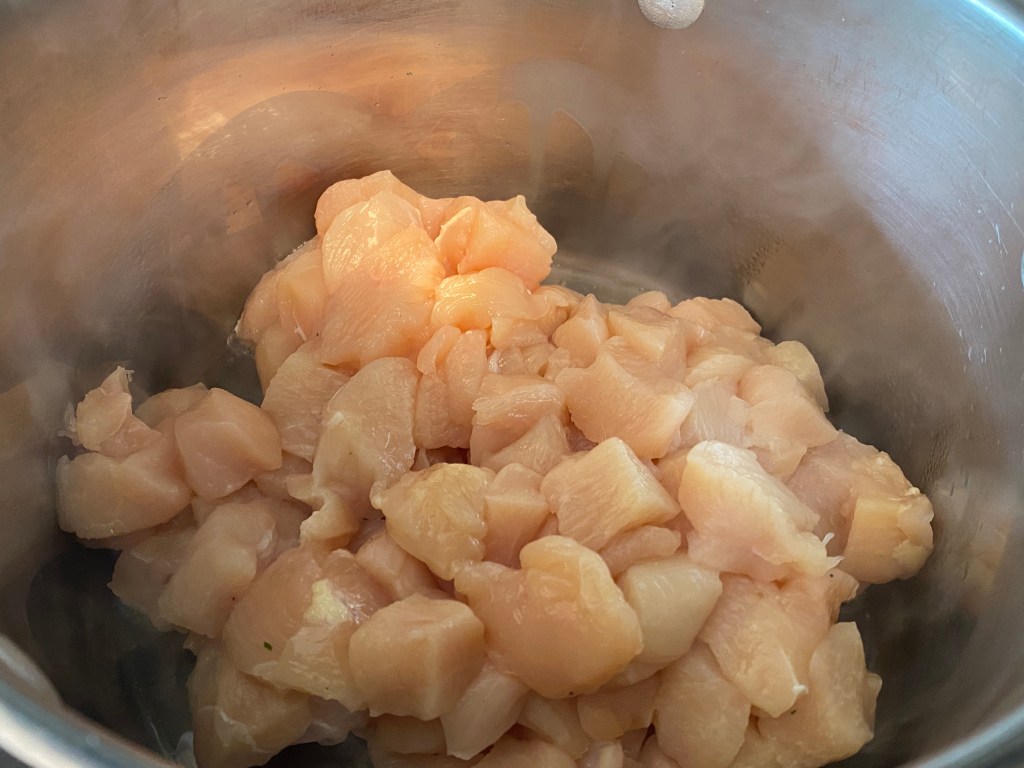
First, you’ll need two boneless, skinless chicken breasts (like the ones you took off that bird from before!), diced to about 1/2″-3/4″. You’ll also need about a cup and a half of small-diced white/yellow onions, and a cup of small-diced carrots. Herbs of your choice should be stripped and fine-chopped. I’ve chosen to use thyme, rosemary and parsley, but any combination of those, tarragon, chervil and oregano would work just fine as well.

You’ll start off by putting a medium-large pot on medium-high heat, and add cooking oil. Once the pot/oil is hot, add the chicken, and cook it until brown.
The chicken might leak excessive liquid, in which case, pour that off into a heat-safe container to reincorporate later. Once the chicken is browned, remove it to a plate. Lower the heat, and in the same pot, add the onions and carrots. Using a wooden spoon, scrape any fonde off the bottom of the pot. Feel free to add up to 1/2c. of water to do so, if needed. Sweat the vegetables until they’re tender, but still al dente — about four minutes, then add the chopped herbs and stir them in evenly. At this point, put the liquid you poured off the chicken into the pot, and allow that to reduce to almost nothing. Now, add the diced chicken breast, 2-3qt. of the chicken stock, and bring the pot to a simmer. Season to taste with salt (you’ll probably need a little more than you think), black pepper, and a splash of something acidic but flavor-neutral (I used about a teaspoon of lemon juice, but red wine vinegar is a good option too). Once your soup is properly seasoned, it is done!
Optional step: adding a starch to your soup is absolutely an option (it ain’t chicken noodle soup without the noodles!), but ignore your impulse to cook your starch in the soup broth! If you do this, while your soup cools down, it will effectively overcook the starch. For chicken noodle soup, for example, cook noodles of your choice separately, as you would normally, in salted water. Don’t cook them entirely to completion though — instead to al dente (this means the center of the noodle should still have a little crunch/firmness to it). Add noodles to what you’re planning to eat in that sitting. As for the rest, prepare a bowl of ice water. Pour out the noodles into a strainer that will fit into the bowl of ice water. Once the hot water has drained off, nestle the strainer in the ice water, which will use the strainer as a barrier between ice and pasta. Move the pasta around in the strainer until it’s cool, then remove. Dry the pasta, mix a little olive oil in it (so it doesn’t stick), and store the noodles in a separate container from the soup, but keep them near each other. The same can be done with diced potatoes, rice or beans, depending on what you want in your soup, and they can all be frozen just as effectively as the soup itself!
Hopefully this has helped demystify the treasures that a whole chicken has hiding under its skin. Best of luck, and don’t get discouraged if it doesn’t come out right the first time. Learn from and understand your mistakes, use/eat what you can, and when you’re ready, stroll down to the store, buy another bird and try ahen… er, again!
